Here is the first block of the Layer Cake Challenge! It's a classic block called Buckeye Beauty. It's quite simple to construct, has lots of possible colorations and looks great whether you make one block or a whole quilt since it creates a secondary design. If you are using 10" squares from a layer cake, choose three: a light (background), a medium and a medium dark. I'm using pinks and browns on a cream background. If you are using scraps that's ok too. Most of us have lots of scraps we'd like to use up! So choose your color scheme and go for it!

Buckeye Beauty
8" finished block
From Cream Background, cut one 2 1/2" strip (2 1/2" x 10") and one 5" square.
From Brown, cut one 2 1/2" strip (2 1/2" x 10").
From Pink, cut one 5" square.
Layer the background strip right sides together on top of the brown strip and sew a 1/4" seam along the 10" edge. Open and press toward the brown (dark) fabric. It should measure exactly 4 1/2" wide and 10" long. If it is too narrow then your seam allowance is too deep. Correct it now. If it is too wide then your seam allowance is too scant. Take it apart and re-sew it using a slightly deeper seam. A thread or two one way or the other can make all the difference. Once your piece is the correct measurement, cut it crosswise into four pieces each measuring 2 1/2" x 4 1/2". Make 2 four patches.
 |
| 2 1/2" x 4 1/2" |
 |
| 4 1/2" x 4 1/2", make 2 |

Now let's make the Half-Square Triangle units. Layer the pink square and the Cream square right sides together. Using a mechanical pencil, draw a line diagonally from corner to corner. Stitch 1/4" away on both sides of the drawn line. Cut them apart on the drawn line press towards the pink fabric. Trim to a 4 1/2" square.
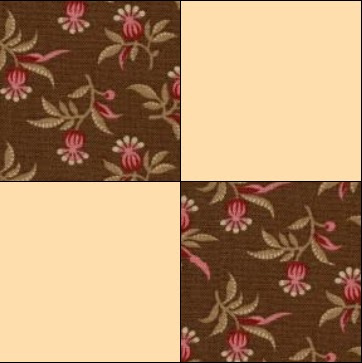
Now let's put it all together. Sew one four patch to one half-square triangle unit to make the top half of the block and repeat for the bottom half paying attention to the first photo for placement of each unit. Press towards the four patch. Sew the top half to the bottom half; the pressed seams will nest together to give you good corners. The block should measure 8 1/2". Ta Da! I hope you like it!
Now I have a confession to make...it took me WAAAAY longer to figure out how to post these instructions than it did to Make the Block!! I'm happy with the block but you'll have to let me know if you need more instructions. I did my best, honest. The techie part is the Hardest thing for me!
I think I'll try this along with you. Will we only need one layer cake or will more fabric be needed?
ReplyDeleteI got mine made!! It wasn't too hard but I did find my layer cake just slight short of 10 inches. I tried to be very careful with all my measurement but still it is probably my fault. With these layer cakes do you measure from the very outside tip of the edge, my guess is that is where I messed up I measured from the very inside of the tip, where there was a whole straight edge. Still learning lots.
ReplyDeleteI'm so glad you got your block made! Layer cakes blocks do run scant sometimes so, yes, I would measure from the outside tip of the edge, not the inside tip. The other thing you can do is to use a scant 1/4" seam so you can have a little to trim off. Especially with the large triangle units there will be some to trim. With the four patches, not so much, so use a scant seam there if it helps.
ReplyDelete