April’s block is a variation of Crosses and Losses. It’s cousins are Anvil and Fox and Geese and Old Maid's Puzzle. There are several possibilities for color placement, as always; that’s what I LoVe about QuIlting, there are always so many ways to play with color in even the simplest block! This block adds more piecing to and is similar to the January block but it’s not difficult. Be sure to read all the way through for other color ideas before you start cutting and sewing!!

Here we go. First the measurements:
For an 8” finished block:

Cut (1) 4 7/8” square
Cut (2) 2 ½” squares
Cut (2) 2 7/8” squares
From Medium print:
Cut (1) 4 7/8” square
From Dark print:
Cut (2) 2 ½” squares
Cut (2) 2 7/8” squares
The Pink squares in the picture are an alternate choice for the dark brown squares. You’ll see a picture of that below.
To Piece the Block:

Using the small squares, pair one light and one dark square and again draw a diagonal line on the wrong side of the light fabric. Stitch ¼” away on both sides of the line. Cut apart on the drawn line. Yield (4) HST units measuring 2 ½”. Trim if needed.

Trimming away even a small bit like this can make a difference later!

Lay out the pieces like the picture below. Sew the block into four sections by sewing a plain square to a small triangle unit.
 Sew two sections together to make two halves of the block. Notice that triangle points do not reach the outside edge of the block. The points should be ¼” inside the edge of the block so that when the blocks are sewn to each other the points will still be there.
  You could add a fourth fabric and make it this way: Choose two fabrics for the large Triangle units and two other fabrics for the small triangle units and small squares.
  I also thought about adding in a fourth color this way:
 Doing it this way would give you a chance to use up leftover pieces from previous blocks and it helps carry color themes or accent colors throughout a quilt. You could also bring in a fabric from your stash to help create a more unique look to your quilt; now your quilt won't be just one line of fabric. There's a general guideline out there somewhere that suggests adding 20% of "other" fabric to your quilt if you're using one line of fabric.
Which do you like better?
Do you want to make a 4” block too? Here it is next to its big brother and little sister. (My alternates are in pinks and browns because I have so much pink and brown to use up. So, I’m actually making two quilts at a time, one in my layer cake and one in pink and brown. If I have some time this month I’ll go back and use my leftovers from the LC blocks for alternates in those colors):
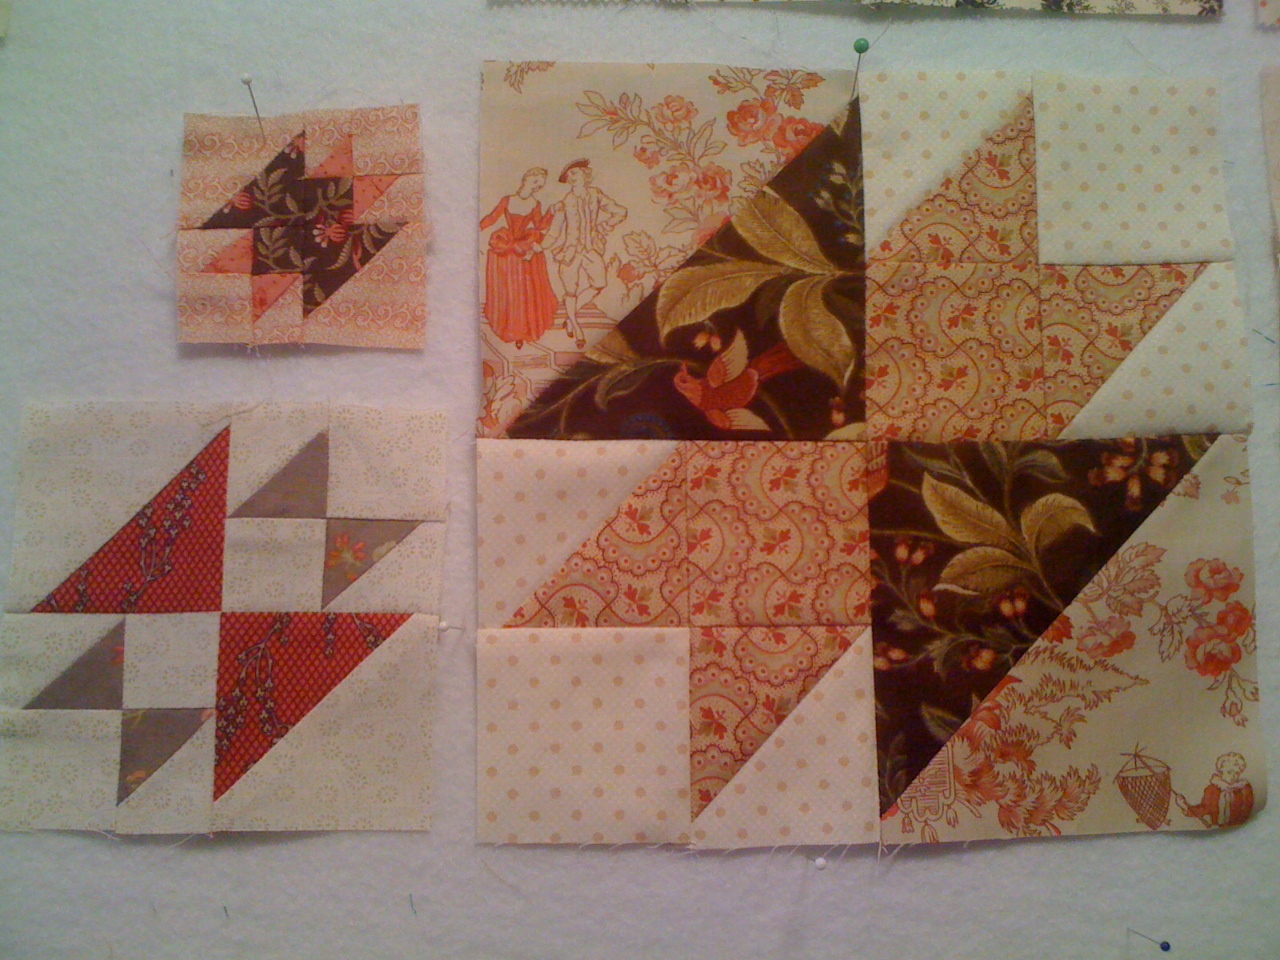
For the 4” block which is the true Crosses and Losses block cut:
From Light print:
(1) 2 7/8” square for the large triangle units
(2) 1 7/8” squares for the small triangle units
(4) 1 ½” squares
From the Dark print (pink):
(1) 2 7/8” square
From the Medium print (tan):
(2) 1 7/8” squares
Pair the same size squares together, draw a diagonal line on the light fabric, and sew as before. The larger units get trimmed to 2 ½” and the smaller ones should measure 1 ½”. Follow assembly directions above.
For the 2” finished block cut:
From Light print:
(1) 1 7/8 square for the large triangle units
(2) 1 3/8” squares for the small triangle units
(2) 1” squares
From the Medium (pink) print cut:
(2) 1 3/8” squares
From the Dark (brown) print cut:
(1) 1 7/8” square
(2) 1” squares
Pairing the same size squares together, as before, make HST units and trim larger units to 1 ½” and smaller units to 1 inch. I actually found it easier to handle the small ones by making them the same size as the larger ones and trimming them down.

Ah, so many ideas…I hope you will have some time today to play with one or two of them!
No comments:
Post a Comment