June is one of my favorite months. Most of the time I can have the windows open to enjoy the breeze. And, there's so much going on it's hard to know which way to turn. I suspect you’re all super busy these days, too. I had these blocks made about three weeks ago and only now am I getting them posted. This month’s block is called
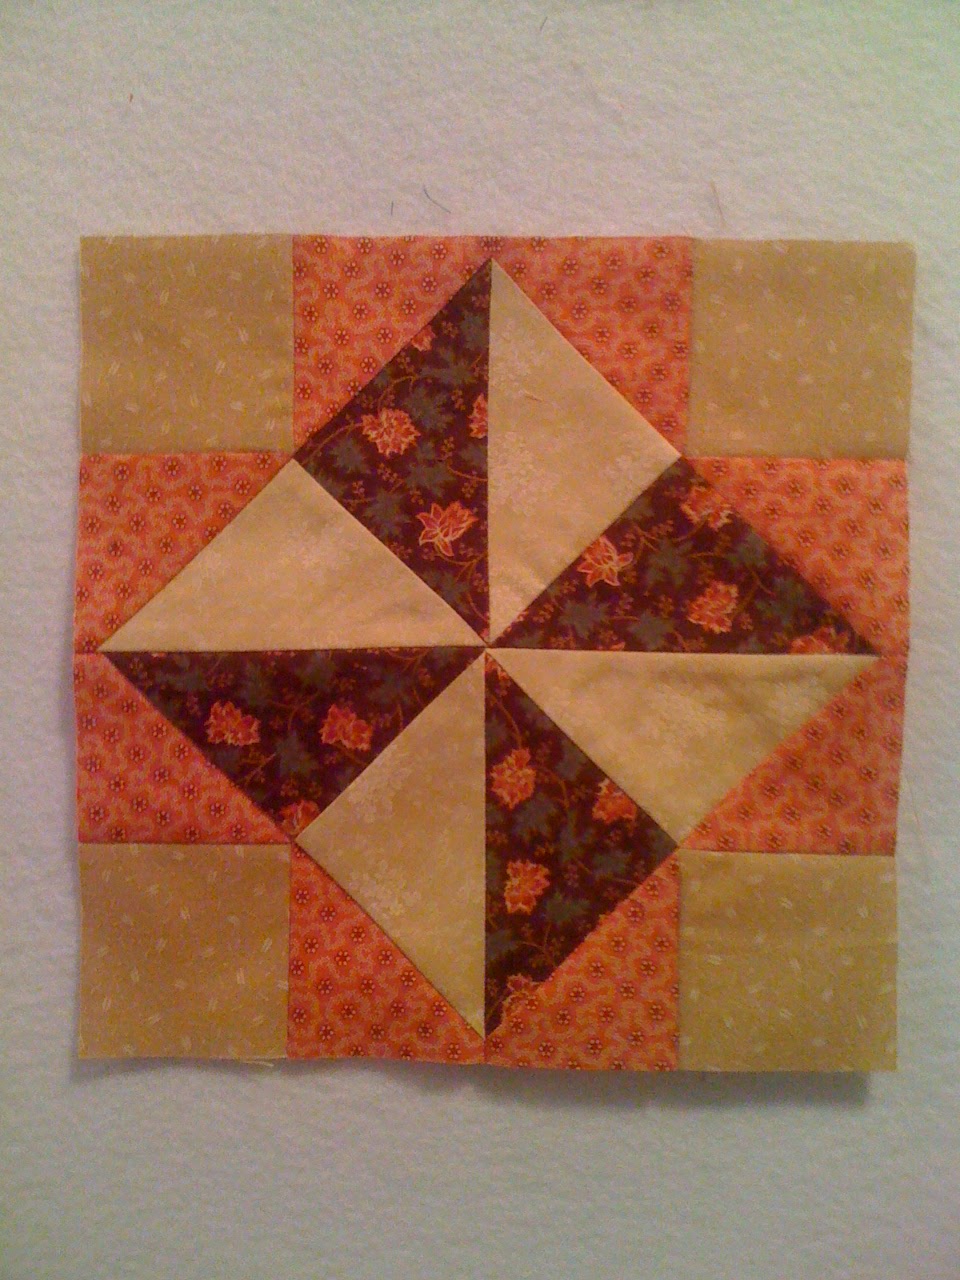
Windmill Square The corner unit is a real good one to know; it shows up in lots of blocks and is a good unit when setting blocks on point. So, let’s get started. Here is the finished block:
Windmill Square The corner unit is a real good one to know; it shows up in lots of blocks and is a good unit when setting blocks on point. So, let’s get started. Here is the finished block:
 |
| Finished 8" block |
For an 8” finished block you’ll need 3 layer cake squares, one light (blue floral), one medium (brown), and one dark (pink). Cut the following pieces from your layer cake squares.

From both the light and the dark cut a 5 ¼” square. Layer them right sides together and cut on both diagonals to yield four triangle pairs. (If you leave them together like this then it's quick to chain piece them.)
Also cut from the light a 2 ½” strip and Subcut into (4) 2 ½” squares.
From the medium print cut (4) 2 7/8” squares and cut them in half once on the diagonal to yield 8 triangles. **If you have an easy angle ruler, use it! Instead, cut (2) 2 ½” strips, layer them so they can be cut at the same time and cut 8 triangles. (Oops, the brown triangles aren't pictured.)
There's always quite a bit left over...I'm working on that part but, if you like the block when you're done then go ahead and make another out of leftovers from any month. :)

It might help to arrange all the cut pieces like this:
(Again, I left the large blue and pink triangles together once I got the hang of it.)
Sew the large blue and pink triangles together along the short edge. Press towards the pink (dark).

Repeat for the other three corner units. (This is called chain piecing. Do this whenever possible to make for quicker sewing.)

Press the seam away from the square. Make sure the edge across the top is straight.
Position the second triangle. Flip it over, right sides together with the lower edge of the square. It will overlap the first triangle. This is necessary so that when the unit is completed the seam allowance for the next seam remains. (See the next picture.)
 |
| Corner unit complete |
Sew the corner unit each to its own triangle pair forming four block quarters:
 |
| Four quarters complete |
Sew them together in rows. Press the top row to one side and press the bottom row in the opposite direction so the seams will nest nicely. Sew the two rows together. Finished!
Here is my pink and brown block:
For this one I chose to use a fourth fabric for the corner squares. To do that cut (4) squares at 2 1/2". What do you think? Do you like that option? Options are always good. Just when you think you have enough fabric for something.... you don't. So, we need options...and everyone might just think you were so clever to do that when, in fact, you were feeling bad for running out of fabric.
And, finally, here is the 4" version:

Here is what to cut for this little one:
From the light and the dark cut (1) 3 1/4" square and cut on BOTH diagonals.
Also from the light fabric (for the corner squares) cut (4) 1 1/2" squares.
From the medium cut (4) squares 1 7/8" and cut ONCE on the diagonal. OR, use an easy angle tool and cut (2) 1 1/2" x 10" strips and cut 8 triangles.
Follow the instructions above to assemble the block.
One last little tip: If you like this block a lot and would like to see another wonderful possibility check out Lori’s blog Humble Quilts. As I was reading her blog I noticed a project she posted last year called Cheddar cheese and crackers. She used a variation of this block with an alternate block of a 16 patch. It’s fabulous! http://humblequilts.blogspot.com/2010/01/cheddar-cheese-crackers-finale.html.
Since I’ve started posting these blocks each month it’s funny how I’ve come across quilts using them time and time again. I’ll try to direct you to where I’ve seen them but I bet the same thing will happen to you too!
One last little tip: If you like this block a lot and would like to see another wonderful possibility check out Lori’s blog Humble Quilts. As I was reading her blog I noticed a project she posted last year called Cheddar cheese and crackers. She used a variation of this block with an alternate block of a 16 patch. It’s fabulous! http://humblequilts.blogspot.com/2010/01/cheddar-cheese-crackers-finale.html.
Since I’ve started posting these blocks each month it’s funny how I’ve come across quilts using them time and time again. I’ll try to direct you to where I’ve seen them but I bet the same thing will happen to you too!
Thanks for stopping by and I hope you enjoy the beautiful month of June.


