Translate

Thursday, November 3, 2011

Guild Show and October Blocks

Did any of you locals have the chance to see the guild's quilt show this past weekend held in Westfield, Indiana?  I think it came off quite well.  I say it that way because I was on the show committee this time.  Although many people worked on it for two years my part of it required the most hours over the past seven weeks.  I'm guessing I put in about 75 hours in that time although I didn't keep track. I'm glad I did it but, it did put me behind on several projects such as the Block of the Month I've been doing for all of you.  Nevertheless, I am so glad to have met and gotten to know several more members of the guild by working on the show committee.  I think it really helps someone to feel more a part of a large group like that when you get involved in one of the activities of the group.  And, the quilts by my fellow oh-so-talented guild members were a delight to see.  Bravo to all!

October's block is Chimney's and Cornerstones.  It's a block I've always wanted to make and with colder weather coming I started thinking about cozy fireside evenings especially those at my Dad's. 

Here is my test block in Pink and Brown. 

For this block you can use leftover pieces from your layer cake squares or choose new ones to cut up.  I used 8 different fabrics but it could be made with as little as four fabrics. 

I started by selecting the two fabrics that create the X but, I'm not sure that is the easiest way to do it :).  Then I considered what I wanted to do with rectangle units.  I chose to repeat the fabrics on opposite sides of center going from lightest to darker (although none are "darks").  The tricky thing about choosing fabrics for this block is to make sure that even the darkest of the rectangles still has adequate contrast with X fabrics.  I probably made it more difficult by choosing a pink for one of these as the rest of the pinks had to be quite light in order for it to work.  But, I really like the way it came out so, I did my Layer Cake block the same way.  Here it is:

Layer Cake Block
There are many possible variations such as creating concentric squares or making each quadrant a different color or creating a log cabin effect instead of courthouse steps as this one is.  Use the cutting instructions below and lay out the pieces so you can make adjustments for the color scheme you select. 

Here are the full cutting instructions:

From X fabrics:
Cut (8) 1 1/2" squares of two feature fabrics. They do not have to be light and dark.  They can be any two fabrics which will contrast with the rest of your block pieces.

For next round cut (4) 1 1/2" x 2 1/2" rectangles.  (Two of each fabric if you're using my coloration.)
For the second round cut (4) 1 1/2" by 4 1/2" rectangles. (Two of each fabric if you're using my coloration.)
For the third round cut (4) 1 1/2" x 6 1/2" rectangles.   (Two of each fabric if you're using my coloration.)

To assemble:
1.  Sew together the four patch in the middle.
2.  Add a small pink print rectangle to two opposing sides of the four patch.
3.  Add the X squares to each end of the small beige rectangles.  Add this unit to the top and bottom of the four patch unit.
4.  Continue each round by adding the (pink) rectangles to the sides and adding the X squares to each end of the logs for the top and bottom before sewing the beige rectangles on to the unit.  Block should measure 8 1/2" square when complete. 

Thanks for hanging in there!  Hope you have some time to sew today.


Saturday, September 17, 2011

September Blocks


I had Another day to play Catch-Up (Thursday), now it’s Saturday….

After taking care of a few errands on Thursday I had a break in the action to work on this post.  I didn't finish it then but after a busy couple of days I can post it for you now.  I hope you have time to look at it over the weekend.  The weather has turned a little cooler and it feels lovely to be outside even if I’m just doing errands.  I’ve got my schedule under better control since last month.   I did finish the Railroad Crossing quilt as well as my other class samples and a couple of customer’s quilts too.  I've also had time to start another quilt top.

I made three blocks for you this month… twice.  One batch in pink and brown and, one from my layer cake squares.  I’ve got lots of 10" squares left and as I’m thinking about setting them I have one idea for using just 12 blocks to make a wall/throw size quilt which will finish at about 62” x 62” but I wanted to offer another option with more blocks in case you want to make it a bit larger (and have less leftover fabric.)  So, this month you can choose which one you want to make or make all three.  Or, if there was one you especially liked in an earlier month you could always make another of one of those.  The second setting I offer will grow more easily to suit the number of blocks you make.

The first block was chosen as a nod to the changing of the seasons and it is called Flock of Geese.  The second one uses up some of smaller leftover bits that I can’t throw away.  And, the third is a tribute to my beloved New York called Yankee Puzzle.  Once a Yankee, always a Yankee; September no longer goes quietly by without my thoughts returning “home”.  

Flock of Geese:

Version 1: Two Fabrics

From both a Light and a Dark 10” fabric square:  Cut  (1)  4 7/8” square, and cut (4) 2 7/8” squares.  (Note:  For the smaller triangles you could also use an easy angle tool.  In that case, cut (2) strips 2 ½” x 10”, layer dark and light strips RST in one stack and cut 8 pairs of triangles with 4 cuts.)

Pair the large squares right sides together and draw a line diagonally on the back of the light square.  Sew ¼” on both sides of the diagonal and cut apart on the drawn line.  Yield 2 HST units.   Press the seam open.  Square up, if necessary, to 4 ½”.   Repeat using the sets of the smaller squares.  Square these up to 2 ½”.  Lay out the block as shown in the photo at right.  Sew smaller units in groups of two then sew twos into fours.  Keep the units all facing in the same direction-light sides facing one way, dark facing the other.  Pressing the seams open will help the block lay flatter especially in the center.

Version 2:  Scrappy

Cut (1) dark and (1) light square 4 7/8”.  Choose 4 different lights and 4 different mediums (pinks) and cut (1) 2 7/8” square from each.  (Stack ‘em and cut them all out at the same time.)  You should have lots of pieces left from previous blocks.  Using them will help tie all the blocks together!  Use the instructions above to assemble the block.


Crossroads:

From one or more Dark fabrics cut a total of (4) 2 7/8” squares.  From one or more Medium fabrics cut a total of (8) 1 ½” x 2 ½” rectangles.  From one or more Light fabrics cut a total of (8)  1 ½” x 2 ½” rectangles AND, (4) 2 7/8” squares.  Lay the pieces out as shown in the photo at right.  Using the squares and the same method as in the Flock of Geese block for making Half-Square Triangle units, layer, mark and sew on both sides of the diagonal to make 8 HST units.  Sew rectangles together into groups of 4 by sewing them together along the long edge.  Sew the center of the block together.  Add a group of rectangles to the sides.  Add a HST unit to the end of each of the remaining rectangle units.  Sew these new units to the top and bottom of the center unit to complete the block. 


For a scrappier effect choose a wider variety of fabrics for the rectangles and further mix placement of lights and mediums.  This pink and brown version really isn't much scrappier than the blue and brown block above.


Yankee Puzzle:

From one light fabric (center pinwheel):  Cut (2) 2 7/8” squares.  From another light cut (6) 2 7/8” squares (or 2 2 ½” strips using an easy angle tool).

From Medium fabric:  Cut (2) 2 7/8” squares (or 4 triangles from a 2 ½” strip using an easy angle tool).

From Dark fabric:  Cut (1) 5 ¼” square, cut in half on both diagonals and (2) 2 7/8” squares (or, 4 triangles from a 2 ½” strip using an easy angle tool).

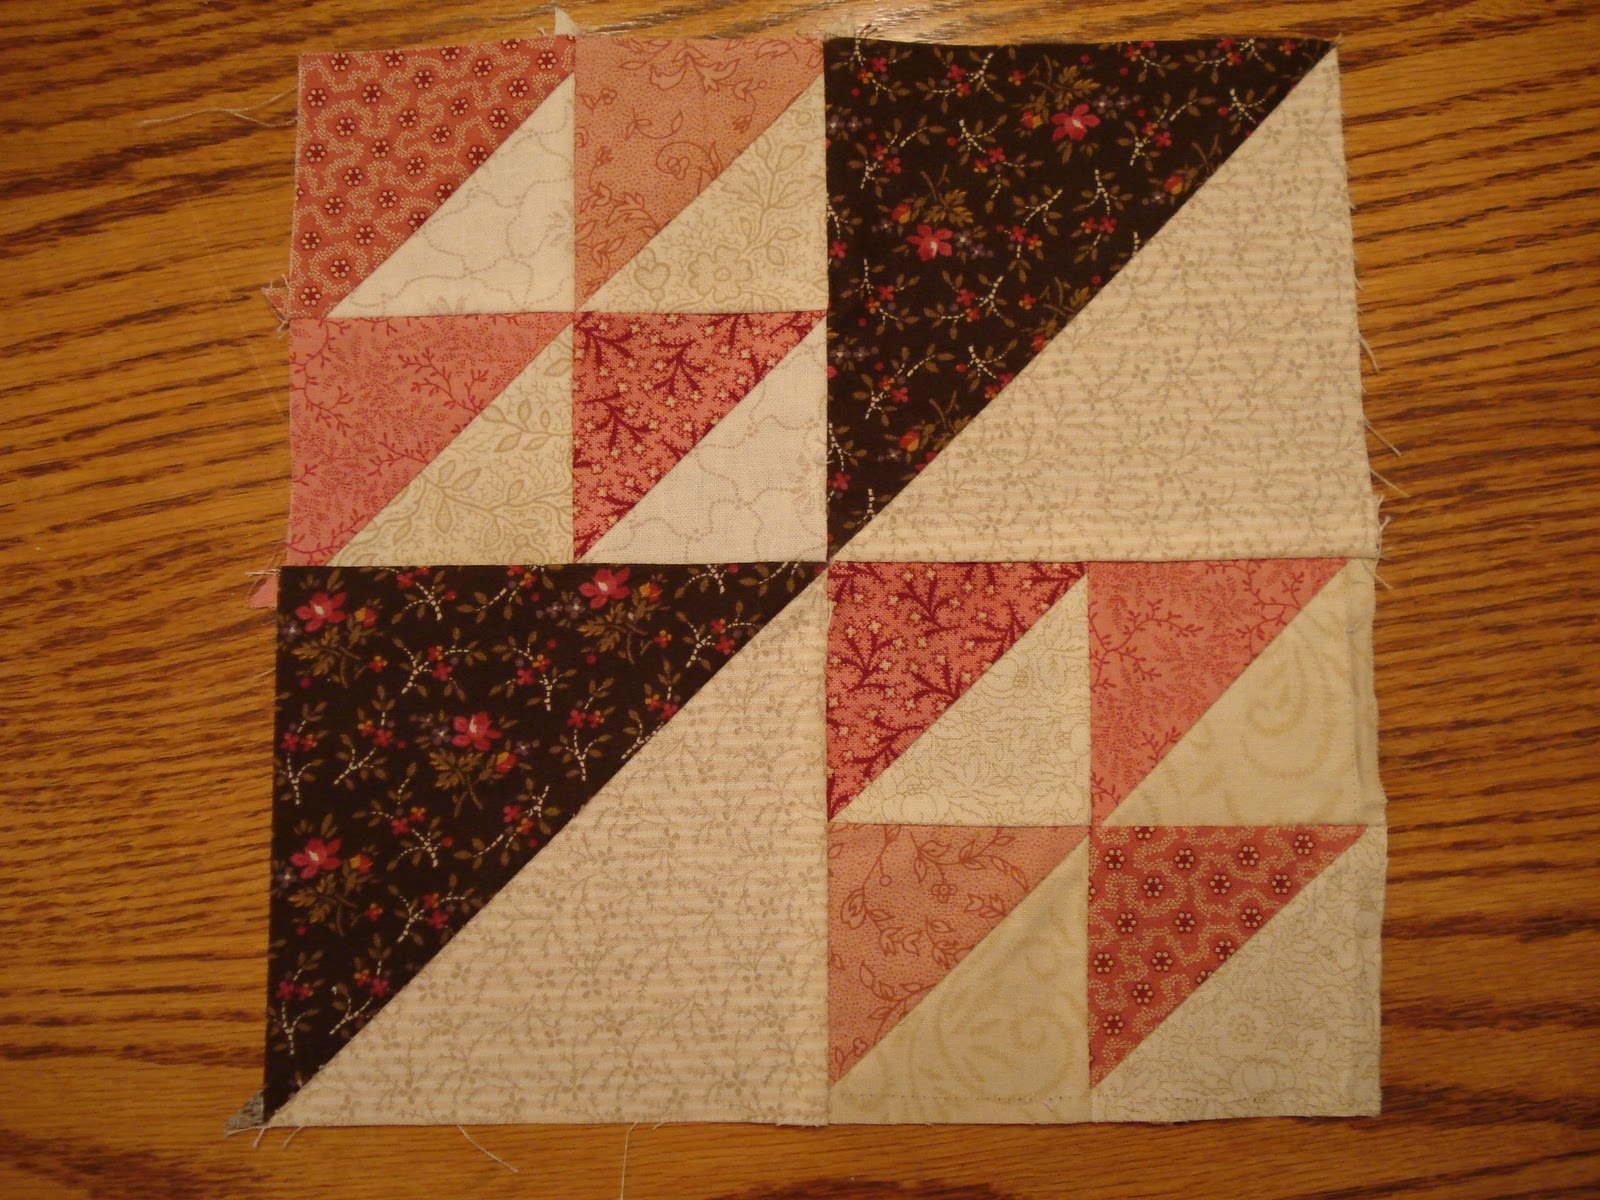
Using 8 matching light triangles sew onto both short edges of each of the 4 large dark triangles making four flying geese units.  Using smaller dark triangles, sew together with 4 matching light triangles to make 4 HST units.  Sew Medium triangles together with remaining light triangles.  Lay out block according to photo at right.  Sew a pair of triangle units onto the bottom of each flying geese unit to make 4 block sections.  Sew 2 sections together to make each half of the block.  Sew the halves together to complete the block.
My two blocks aren't much different from each other.  The top one is from my layer cake squares, the bottom one is from my stash.

Note:   I use an easy angle tool much of the time especially with 10” squares.  I feel like I get better usage out of my squares.  From (1) 10” square I can cut (2) 2 ½” strips and (2) 5” squares.  With those units I can cut almost every piece for these blocks, both triangles and squares.  However, I did not pre-cut my squares into these units. 

I hope you will enjoy making one or more of these blocks!  Enjoy the season!


Monday, August 15, 2011

A Good Day for Chicken Tortilla Soup!

I have the day at home today so I am busy with all types of housewife-y things.  You’d think that I’d have a regular schedule for these activities but my work schedule varies so I end up catch as catch can.  As I rev up my machine quilting business I see the need for more deliberate scheduling on my part so I can get all my quilting done as well as my customers.  Thus, being home today meant cleaning, laundry, making homemade soup and banana bread; all things I could work on while I did a little sewing.  Throw the laundry in, get the bread in the oven, sew.  Start the soup, take the pictures, finish the last block, finish the soup.  And, so here I am, ready for dinner, and ready to post the August  block.  Yippee!   I think that means I’ll get to sew the borders on my Railroad Crossing quilt tonight. 

I thought I’d share a couple of other little things before I give out the instructions for the next block but, if you’re in a hurry, just scroll down and come back up here when you have a chance.  I took a workshop last Friday with Susan Cleveland called Piping Hot Binding.  It was wonderful!  Susan is the real deal.  She is the kind of person you’d want for a best friend.  Not only that, I think almost every single person in the class came really close to completing the project IN CLASS!  I’m about 90% done and that has never happened to me before.  I have about a dozen tubs of UFO’s from workshops I’ve taken.  But, this one I will finish, and soon.  Check her out.  And, if you get a chance to take one of her classes do so.

I also finished the graduation quilt for my niece and will bring it to her soon.  She starts college at the end of the month.  I’m glad I have some time to show it around a little bit before handing it off!  And, yes, those are super-sized Hexies.  I hope she loves it. 


Now for the August block.  It’s called Indian.  And, I also made a variation of it called Indian Star.  If you have in your layer cake a square with a motif you’d like to highlight then this block will do that for you.  There is a 4” finished square in the middle so you can fussy cut something for it if you want to.  I just used a pretty print.


Let's cut the pieces for it:

From the Light print cut
 (1) 4 1/2" square, fussy cut if desired
 (4)  2 7/8" squares
 (2)  2 1/2" squares
From the Dark print cut:
(4) 2 7/8" squares
(2) 2 1/2" squares


Next, using my Quick Quarter Tool by Quilter's Rule, I draw a diagonal cutting line and sewing lines on the wrong side of the 4 light squares.


 Pair each light square with a dark square of the same size and sew on the outside lines. Remember some of your pieces will have a pinked edge.  Here is how I line them up.  You can see the dark print showing beneath the pinked edge.
Here is a super close up of sewing just towards center of the drawn line.  If you have had trouble with your units coming out to small adjusting your seam allowance like this may help.  Doing this allows for the thickness of the thread.  Sometimes a tiny adjustment like this makes all the difference!

Cut them apart on the center line to yield 8 half square triangle units.  Open and press the seam allowance towards the darker fabric.  They should measure 2 1/2" square.  Trim, if needed. 
Lay out all the pieces like this:  Pay attention to the direction of the triangle units.  Dark is always next to light and vice versa. 

Sew the triangle units together in pairs.  They should each measure 4 1/2" by 2 1/2".  It's easy to let your seam allowance change and then you end up with your pieces ruffling or skewed.  Sew straight in and straight out of the seam. 

Add the squares to the top and bottom row pressing away from the center.  Sew triangle pairs on to the sides of the center square and press towards the center.   Three rows complete.   Now sew the top row onto the center row and press towards the center.  Repeat to sew the bottom row on.  Your block is complete!


Here are my other sizes and variations:             You can use a third print for the center square or, you can put a four-patch in the center and turn the triangle units to look like a star (you'll use the same number of triangles) or, you can make it scrappy and 4 different lights and 4 different darks for the triangles.  When I did this I cut the squares in half on the diagonal before sewing them so I could mix them up even more.  Just be gentle with the bias edge.
Four a 4" finished block:
The center square is cut at 2 1/2".  The corner squares (all dark this time) are cut at 1 1/2".  The squares for the triangle units are cut at 1 7/8".  If you want a four patch in the center instead of a plain square cut 2 light squares and 2 dark squares the same size as the corner squares 1 1/2". 

For a 2" finished block:
The center square is cut at 1 1/2".  The corner squares are cut at 1".  Cut the triangle squares (4) light and (4) dark at 1 1/2" and trim them up to 1".   (They're easier to work with if you start out a little bigger and trim them.)

Thanks for visiting!  Hope you enjoy the rest of your day!